Tag Archives: rigid foam

Trailer Mods, Autumn 2016

In addition to the solar array setup we have running now, we have also been busy with more internal modifications to the trailer. Last year we ripped out the first part of the trailer, in the dining/kitchen and living room area and had it insulated with spray foam. This year, it was time to do the rest of it: the bedroom and bathroom area.

Kat has done a lot of work on this while I was working on the solar. She did all of the destruction and gluing of the strapping to the aluminum studs. The only thing I did for the destruction was handle the electrical and plumbing parts. Kat documented that part on her blog so feel free to go over there and read up on it.

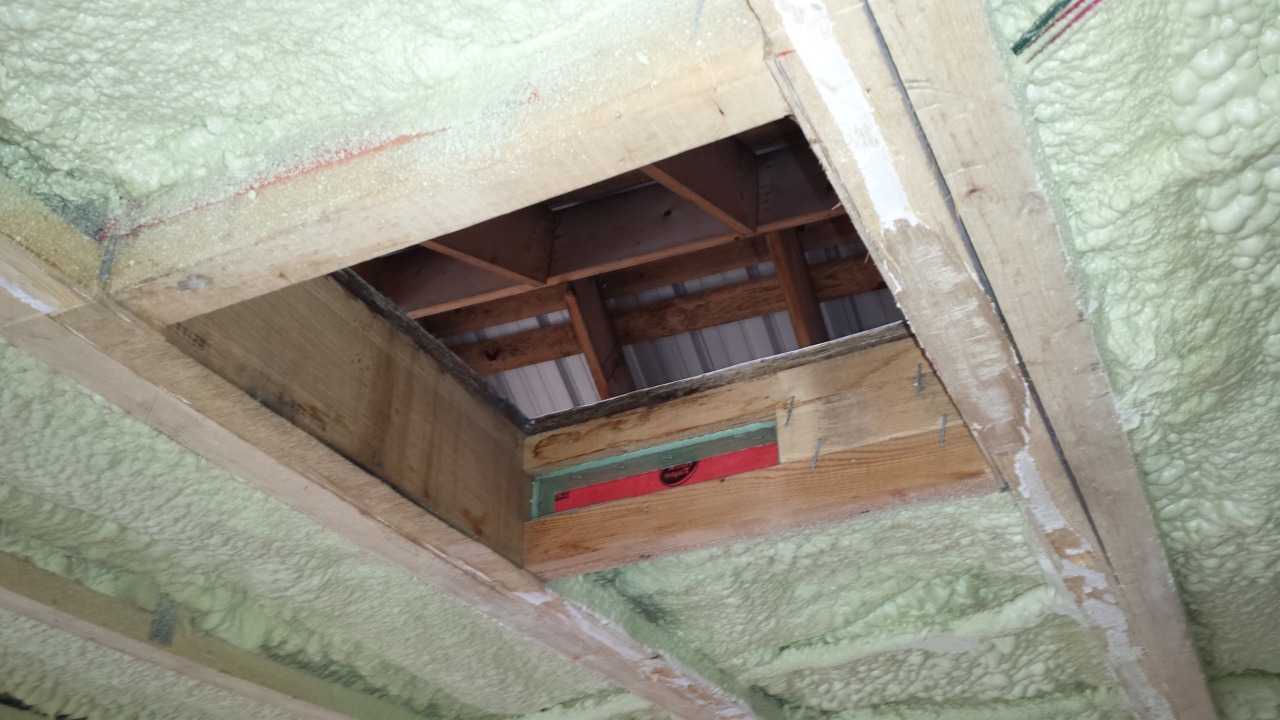
Once all that prep work was finished, the day after we had the solar hooked up, the spray foam guy arrived. Here is what it looked like just before it was foamed.

sprayfoam2016_01

We wrapped all of the electrical outlets in plastic bags and put packing tape over the strapping. This made it way easier to deal with once the foaming was done.

It didn’t take long either. Maybe 40 minutes, start to finish. I took this picture right after it was done and it was still warm.

sprayfoam2016_02

I spent some time scraping the floor, sweeping and I put some plastic sheets down and then I let the K/Cats back in. We spent the rest of that first afternoon trimming the foam down in places where it was sticking out too far from the wall. In other words, we made a big mess.

sprayfoam2016_03

As the weather man was predicting some rather cool overnight temperatures in a few days, we were highly motivated to get the wood stove back inside and setup. So we went right to work and put the rigid insulation down on the floor.

sprayfoam2016_04

The next step was to use up the rest of the laminate flooring that we bought last year. As you can see from the pictures, there are multiple tiers to the floor, so there was a lot more cutting to do. We had enough to finish the two main sections plus the closet. The highest tier at the back was left with just the foam board as it will have the bed and storage shelving to cover it.

sprayfoam2016_05

With the floor completed, we moved the bed over into the new area, just sitting on the floor for now. It’s a bit chaotic, but then again, this whole process is chaotic anyway so we’re used to it by now.

sprayfoam2016_06

With the other end of the trailer now available, all we needed to do was reinstall the wood stove. It needed a bit of TLC having been out in the truck shelter all summer, but Kat took care of that. While she was doing that, I cleaned the internal stove pipe and went up on the roof and cleaned the chimney as well. Might as well start the year with a clean stack.

We had the spray foaming done on Tuesday and we had the wood stove back inside and in working order on Saturday (Sep 24th).

sprayfoam2016_07

If you were to go back and read my blog entries from the previous years being in the trailer, you would see that we didn’t have the wood stove up and running until November those last two years. This is the earliest we have had it up and running and when the outside temperature drops, we can easily add some heat to our living space. One might say too easily. We were down to shorts and t-shirts that first night.

Having the wood stove back inside was really nice, but there is still much to do in terms of getting everything put back together. We had purchased a number of materials for this, the first of which is the cedar tongue-and-groove for the closet. This is the closet before we started.

newcloset01

Starting from the bottom, we worked our way up the back wall. I was outside doing the cutting and Kat was inside attaching the pieces to the wall using the brad nailer.

newcloset02

It went pretty quickly, though after the back wall and ceiling were done, Kat stopped to work on making lunch. I went ahead and cut all of the pieces for the side walls and put those in while she was working on that.

newcloset03

I started working on the hanger bar that afternoon, but we had to quit early due to a rain delay. These are the issues you face when your workshop is the outdoors. Fortunately, it was nice again today so I was able to finish the hanger bar.

newcloset04

We’ll be putting in some trim in the corners, but as far as functionality goes, we have a closet now. Which is really nice as we were then able to bring in some bags of clothes from storage and hang them up. This is a good thing considering we mostly had summer clothes in our bags on hand, which are rapidly becoming less useful as the days get shorter and the nights get cooler.

From here, we have some pine tongue-and-groove for the ceiling, which will probably go up next so we can put the light fixtures back in place. After that, the bed frame needs to be built and then I can work on storage compartments.

There’s always more to do, but we’re pretty comfortable right now, which means you have less stress to work on those things yet to be done.

Graf-Levac Earthship Visit number 2

Yes, only three weeks after the first visit, Bob and Marie had a second open house to show off their progress. Luckily for us, we were house sitting in Ottawa already so we didn’t have to make another major road trip for this one. Also, the weather was way nicer this time, as well.

I took some more pictures and I will try to better explain the changes to the framing that their contractor, Dave, has done for them.

First, here is a section drawing of what standard Earthship usually use.

SectionWithTrussDetail

So in that picture you can see the roof beams (logs in this case) sitting on the back wall and the vertical greenhouse wall. Moving towards the right, on the end of the logs there is a nailing plate and then the trusses are attached to that. The trusses are those triangular pieces that look shaped kinda like a bluejay’s head. From there, the window struts for the angled glass run down at 70 degrees to the front tire wall.

Now let’s take a look at what Bob and Marie have at their Earthship.

LevacGraf_Earthship_May2016_005

As you can see, the beams just run straight out. There is no nailing plate or trusses to deal with. The window struts run down from the beams at 70 degrees. They also have a significant overhang over the windows as well, which will reduce their summer sun gain, but not effect the winter solar gain.

This is a closer view of the roof over the east wing wall. You can see the framing around the outside that will contain the insulation that will be put up top. More details on that in a sec.

LevacGraf_Earthship_May2016_006

This is around the back of the east wing wall roof.

LevacGraf_Earthship_May2016_007

If we look up top at the actual roof as it was when we saw it, it has the decking put down along with the tar paper on top of that. Next there will be 8″ (20.3cm) of polyiso rigid insulation. That’s why that framing wall extends up so high above the edge of the beams.

LevacGraf_Earthship_May2016_008

From underneath, you can see the pine tongue-and-groove that they used for their decking. For the exterior sections, which will be covered over, they just used OSB (oriented strand board) as it’s not going to be seen anyway. The sections with the tongue-and-groove decking will not be covered; that will be what it will look like when everything is finished.

LevacGraf_Earthship_May2016_009

This next one shows a shot down the greenhouse hallway. Take notice of the vertical posts of the vertical greenhouse wall and are holding up the big support beam for the roof beams. They go straight down and sit directly on top of the footing.

LevacGraf_Earthship_May2016_010

Now compare that with the framing for this standard Earthship.

VigasFromFront

In Bob and Marie’s Earhship, there is no second pour of concrete, no elaborate stacks of lumber to create posts, no framing boxes. It’s really nice and simple. Of course, there will be more added in there once they start framing for the glass, but it is quite a bit more simplified.

Here are the stacks of rigid insulation that will be going up top.

LevacGraf_Earthship_May2016_011

This last picture shows the open section at the very back.

LevacGraf_Earthship_May2016_012

That open section will have a bunch of other details added, like eaves troughing that will channel all the roof water to the big cisterns. Before that happens though, they will be putting in all of the stuff to waterproof the section from the edge of the roof back to the cisterns as you don’t want water to get in behind your tire wall. That would be bad.

Great stuff, and we can’t wait to see it when it gets fully enclosed. Looking forward to that.

Trailer rebuilding: grouting

Today was another unseasonably warm day, even more so than yesterday. A great day to grout your tiles. Unfortunately, there are always a number of things you need to do before you can actually start that.

The first thing was a trip to the store for some supplies. From there we headed up to the trailer, but of course, we arrived much later than normally.

The next thing was to put the border down between the edge of the tiles and the laminate floor so I would have something to grout up against. After starting it and thinking about what I was doing, I had a change of heart and decided on a different approach.

You see, I had a rather wide piece of border – around 2″ (5cm) – that I was going to attach to the laminate floor and have it overlap the gap up to the tiles. Then I started thinking about that gap and why it is there. The instructions for installing laminate flooring have you put in a 1/4″ (6mm) gap between it and the walls, so I did the same thing when it got up to the cement board where the tiles were going. You do this to prevent buckling when the floor expands and contracts due to differences in temperature.

Our trailer experiences the full gamut of temperature deltas, much more so than your average house. That floor will probably expand and contract quite a bit. If I were to attach the border to the laminate and then grout up against it, it’s likely to either pull away from the grout, or crack it when the floor expands when it gets warmer. At least this was my reasoning.

So option two was to glue a small boarder to the cement border itself for the grout barrier and then put a separate border over the gap. Luckily, I had materials for doing that.

Here are the tiles after I removed all of the spacers and cleaned them up.

TrailerRenovations_Day17_000

I don’t actually have a picture of me putting in the border, unfortunately. But after all that starting, and then changing our minds and such, it was getting on towards lunch. On top of that, the place where we got our panels from called us and said our new ones had arrived. So we headed out, had something to eat and picked up our stuff.

By the time we got back, it was late afternoon (15:30ish) which, at this time of year, means it is going to be getting dark in about an hour. I quickly jumped into the grouting and went full bore on that. Here you can see me working with on the sponging.

TrailerRenovations_Day17_002

It took me about an hour to do it all, which is good because it was getting dark in the trailer. I managed to finish it with just enough light left. This end picture was taking with the flash on.

TrailerRenovations_Day17_005

Hopefully that will have a chance to cure overnight and we can clean it up tomorrow. Then we can bring in the wood stove and reconnect it to the chimney. After that, we’ll have some heat, finally 🙂

Kat was not idle during all of this either. She put down the insulation on top of the kitchen slide-out in the morning. I have a picture to prove it too.

TrailerRenovations_Day17_001

We’re planning to just put plywood on top of that section as there isn’t any point in using the laminate flooring because it won’t be seen when we put the cabinets and counters back in. My only dilemma is how to secure the plywood. We could screw it down through the insulation to the OSB below, but that OSB is the outside wall. If we go through it, the screws will be exposed to the outside. Of course, I supposed we could always insulated it from the outside on the bottom to compensate for that. Also, it being OSB, you really want to have a decent penetration depth for the screws otherwise they just won’t hold.

The other option I’m considering is to just glue the plywood to the insulation, but that doesn’t give much of a solid connection to the OSB. The insulation is just taped down with two-faced carpet tape.

We’re certainly open to suggestions if you have any.

Trailer rebuilding: tools, tiles and more

So I didn’t work on the tiles yesterday as it was Sunday, and as I mentioned in my last post, we were exploring options on how to get the tiles cut. The larger building centers are closed on Sundays, so I needed to find something else to do. This isn’t difficult because we have a list of several pages of things to do 😛

After having removed all of the duct work in the ceiling and covered over the duct vents on the floor, I looked up at the ceiling where the air conditioning unit was located and asked myself, ‘why are we keeping this?’ I couldn’t come up with a good reason, so I took it upon myself to remove it.

First I took out the four big bolts from inside and disconnected all of the wires. Then I went out side, climbed up the ladder and got onto the roof. I removed all of the screws holding on the cover and this is what I found.

TrailerRenovations_Day13_000

Yes, that is a rather large wasp nest attached to the side of the fan. It was long defunct so I pulled it apart and one of the pipes leading to/from the radiator unit was going right through the nest. These guys had it good with, most likely, a built in heater, provided the AC was running.

Anyway, it turned out that it was only those four big bolts that were holding it on as I was able to remove the unit without doing anything else. After the removal, we had yet another hole in the ceiling to deal with.

TrailerRenovations_Day13_001

So I pulled out the 6mil vapour barrier and covered the hole. Then I put in 3″ (7.6cm) of rigid foam board and then spray foamed all of the cracks and around the edges. It looked like this from inside when I was done.

TrailerRenovations_Day13_002

Up top, I put a full layer of spray foam on top of the rigid insulation and then I covered the hole with more vapour barrier. It kinda looked like a well frosted cake.

TrailerRenovations_Day13_003

I then took a spare piece of plywood, caulked around the edges of the hole and covered it with the wood. I screwed it in using sheet metal roofing screws as they have a neoprene rubber sealing washer on them. I then caulked the edges and ended up with this.

TrailerRenovations_Day13_004

After that was done, I tried to work on some of the awkward paneling between the big windows at the back. I didn’t get very far as the cutting and trimming of the pieces takes forever. The curved spots around the windows are a pain and the spots you are trying to fill aren’t necessarily square or straight. There is a lot of trial and error with trimming a bit, trying it, trimming more and so on.

So that brings us to today. Today was a good day, not only because I got some things accomplished, but I also bought a new power tool. More on that in a moment.

I looked at the cement board joints I had filled with joint compound the other day and I wasn’t satisfied. You want your floor to be as flat as possible. Any irregularities will cause issues with the tiles sticking properly. So I pulled out the joint compound and did a second coat, making sure this time to make it a nice smooth flat surface. This ensured the fact that I wouldn’t be gluing any tiles today, but I still had some to cut anyway.

Here is the repatched cement board.

TrailerRenovations_Day14_001

A little sanding tomorrow and it will be good to go.

So, you need to cut some tiles, eh? Well, I considered taking them to the shop to have them cut, but I also want to cut some bricks for under the feet of the wood stove, so I opted to buy a tool instead. I didn’t want to buy a tile saw as it’s a bit more specific than what I want, so I opted for an angle grinder.

Here it is.

TrailerRenovations_Day14_002

Along with a diamond grit ceramic tile blade, this little doodad goes though tiles like a hot knife through butter.

I got all of my cuts done with no breakage and in no time at all. That’s the 4.5″ (11.5cm) diameter blade angle grinder made by Dewalt. I have a cordless drill, a jigsaw and now an angle grinder from Dewalt and I have to say I have no complaints about any of them.

The only downside to cutting the tiles with the angle grinder is it makes a huge mess. I was covered head to toe with ceramic dust by the time I was done.

It was worth it, though, as you can see.

TrailerRenovations_Day14_003

Yes, I managed to cut out the spots for the vents. Yes, the one on the right is completely contained in one tile, which made me nervous as the one side only has about 3/4″ (1.9cm) width to it. I was thinking it was going to break when I was cutting it, but I was wrong. It all worked great.

Of course, with the holes cut I had to check if the vent grills would actually fit in the holes. If they didn’t there was going to need to be some more trimming. Alas, all was good. The grills fit just fine.

TrailerRenovations_Day14_004

With the joint compound needing more time to harden, I switched over to working on the paneling between the windows again. After much fuss, I managed to get them all filled in. In total, I’m sure it was several hours work, which is depressing considering it’s only four small, skinny pieces.

TrailerRenovations_Day14_005

I also had an off-cut piece that was almost a perfect fit for the first section above the windows so I went ahead and put that in too.

TrailerRenovations_Day14_006

I also used some wood filler to fill in between the seams. It’s supposed to be mahogany coloured, like the panels, but it doesn’t really match, even after it hardens. That’s okay, Kat plans to paint it all anyway, so all we need it to do is fill in the seams.

With the tiles all cut now and the cement board fully prepped, we should be able to glue the tiles down tomorrow. I’m looking forward to that 🙂